FasTest Access Ports
Complete solutions for efficient processing and leak testing of HVAC refrigerant systems.
Complete solutions for efficient processing and leak testing of HVAC refrigerant systems.
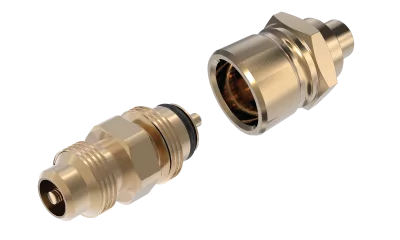
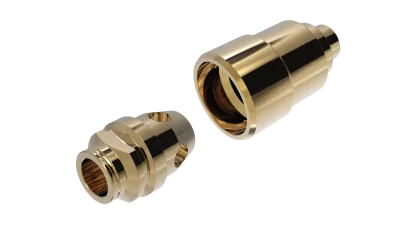
FasTest HVAC service ports and refrigeration access valves deliver superior quick-connect solutions for charging, evacuation, leak testing, and processing in modern HVAC-R systems. Replace outdated Schrader valves or stub tubes with our service port hvac designs—like CoreMax, ZeroMax, and PortMax—for up to 5x higher flow rates, near-zero emissions, and hermetic sealing that complies with low-GWP refrigerants. These service port refrigeration innovations reduce processing time, minimize refrigerant loss, and enhance safety for OEM manufacturers and field service alike.
![]()
![]()
![]()
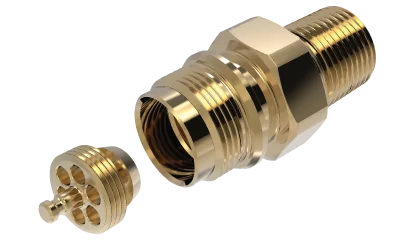
The NEW PortMax™ access port system is specifically designed to reduce processing time, in particular, evacuation time (degass/dehydrate) of large volume refrigerant systems currently processing through packed angle or ball valves.
Maximum Flow & Speed — CoreMax provides up to 5x greater processing flow than standard Schrader valves; PortMax slashes evacuation times for large-volume systems—ideal for faster production cycles and reduced takt time.
Near-Zero Emissions & Sustainability — ZeroMax eliminates stub tubes with hermetic metal-to-metal sealing for near zero emission charging/evacuation; fully compatible with 21st-century low-GWP refrigerants to meet environmental regulations.
Safer, More Reliable Access — Integral shut-off features and quick-connect designs minimize leaks, refrigerant loss, and operator exposure—enhancing hvac service port reliability during manufacturing, field service, or recovery.
Versatile Applications — From residential packaged units and mini-splits to commercial refrigeration, ice makers, and PTAC systems—our refrigeration access valves replace traditional methods across the HVAC-R industry.
Custom & ICON-Ready Options — Need a tailored service port hvac solution? We either have it or can make it, with optional ICON™ Technology for smart verification, data logging, and automation integration.
Residential and commercial air conditioning units (packaged, ducted split, mini-splits)
Refrigeration systems (display cases, food merchandisers, cold chain equipment)
PTAC/VTAC, ice makers, pool heat pumps, and large chillers
OEM production lines requiring high-throughput charging/evacuation/leak testing
The Evacuation Cart is a turn-key, optimized solution with real-time tracking and data capabilities directly from FasTest.
Can't find the exact hvac service port, refrigeration access valve, or configuration you need? Contact a FasTest Access Port Specialist for expert guidance, custom engineering, or a quote.